How to Pass A Belay Test - A Beginner's Guide
- Jul 29, 2018
- 10 min read
Learn to pass your local Climbing Gym's lead belay test!
So, you’ve outgrown your chuffer top-rope buds and are ready to do that thing where you take the rope and attach it to those clippie things on the wall. Congratulations! You’re almost a real rock climber. Maybe you’ve taken a lead course and learned from a (hopefully) qualified instructor. Or maybe your buddy Jim took you outside and told you how to over-ride a Gri-Gri so you can lead belay him up his sick 5.8 proj. Either way, if you want to lead climb in a gym you will have to pass a lead belay test. But what are the instructors looking for? What did Jim fail to mention about lead belaying? Well young guppy, let’s take a look at how to pass a lead test at any climbing gym.
Gym testing is not standardized, however, I have had no issue passing any tests with the following techniques. Most gyms (at least in Ontario) only allow Gri-Gri’s, some allow both a tube style device and a Gri-Gri. There are differences between the two that we’ll cover below.
Going into the test.
Most gyms will require you to climb a certain grade for your test, usually around 5.8 or 5.9. You should be confident climbing this grade on all types of terrain without getting so gripped your hands go through rigor mortis. You should also be taking the test with a partner whom you know and trust; You don’t want a stranger who was taught by the aforementioned Jim catching you for the first time. Hopefully you have experience catching falls, and know what it means to give a “soft” catch. You will need your own harness, belay device, and rope.
Starting the Test
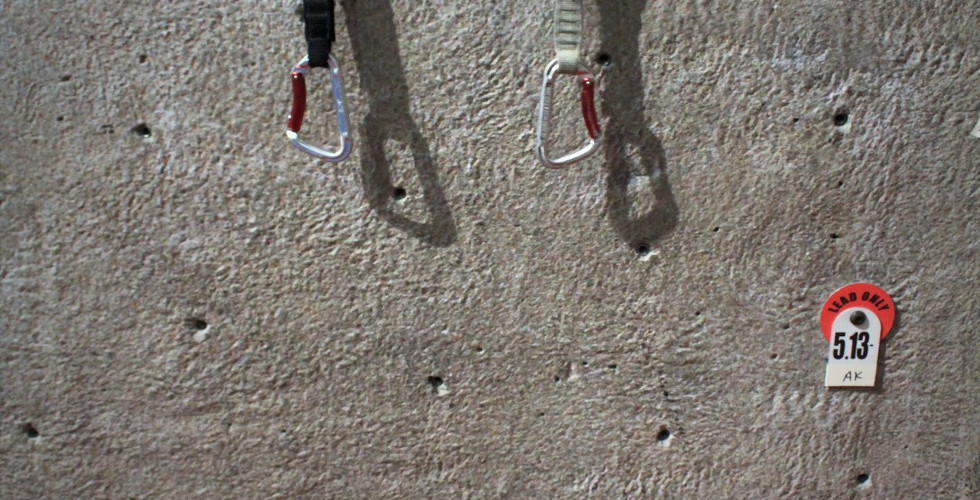
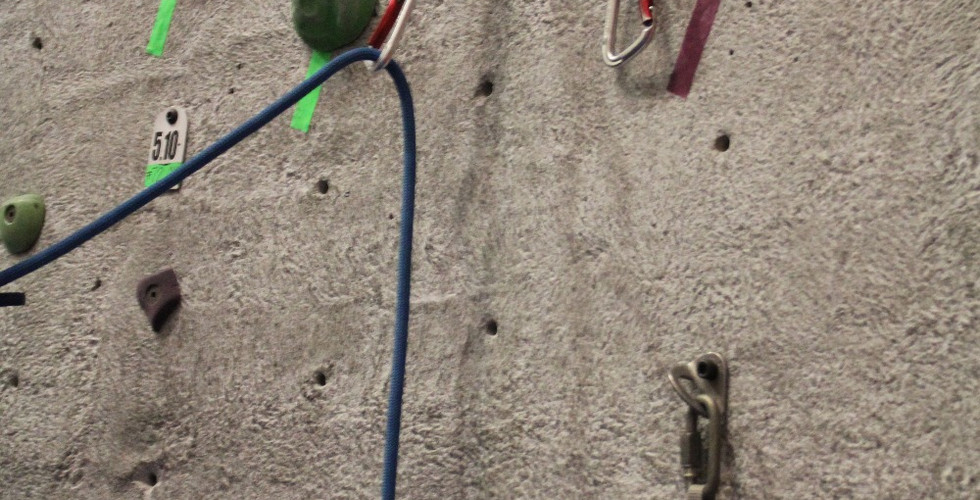
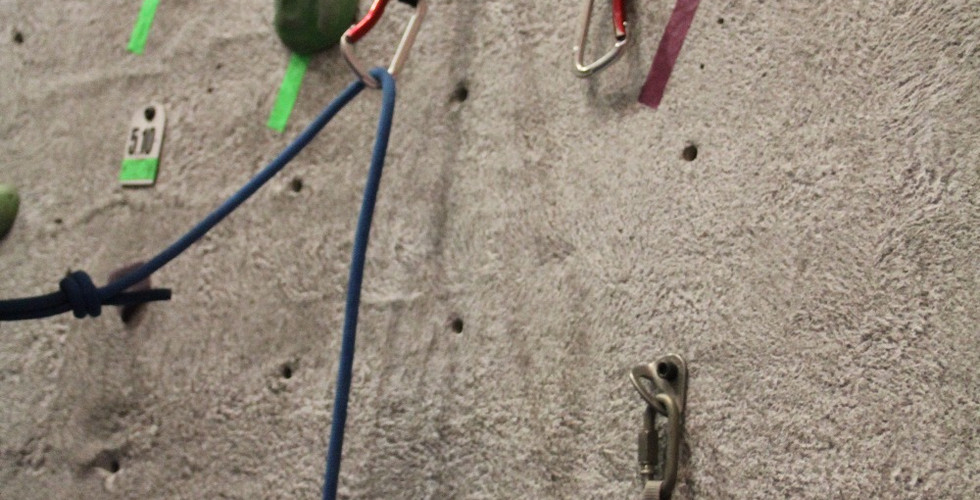
Most gyms will want to see you clip before you even leave the ground. Instructors will pull out three quickdraws and secure them to the wall. Two draws will be placed beside each other in an anchor setup with the gates facing opposite directions. The third will be placed a couple feet underneath this setup (pic). You will be asked to clip and dump each draw (gate in, gate out) with both hands and demonstrate clipping both draws like an anchor on the top of the route. You will be asked to show what a back clip is, then fix it. You will then be asked to show what a Z-Clip looks like, then fix it. Fixing back clips/Z-clips is as easy as dumping the higher quickdraw and clipping it properly. You might also be asked why these kinds of mis-clips dangerous. In certain situations, back-clips can unclip themselves in a fall. Z-clips create a large amount of drag and increases the distance you will fall.
For tips on clipping, check out this video!


Auto-Fails
Phew. Now you’re almost ready to leave the ground. But wait, we gotta go over the instructor’s favorite part of the test: auto-fails. The test will stop immediately if you do any of the following: load the belay device incorrectly, fail to lock your belay biner, take your hand off the break end of the rope at any point while belaying, provide a hard catch, stand in the wrong position, constantly short-rope the climber, tie in to the rope incorrectly (use a figure 8 knot, ask if they require some kind of stopper or tuck with the extra slack), skip clips, back clip, z-clip, have your leg behind the rope when climbing.
Whoa, that’s a lot. But don’t worry, it’s really easy to avoid these auto-fail situations. We will go over some more of these in detail so you won’t chuff it up at your favourite climbing gym, and everyone will want to climb with you!
When you’re the Climber
Tie in to the rope with a proper, well dressed figure eight knot. Most gyms will require a double fisherman’s stopper knot at the end, as well. A clean well dressed knot shows this isn’t your first rodeo. It will put the tester’s mind at ease, just a little bit. Then do a FULL partner check on your belayer. A FULL check includes: harness on properly (buckles doubled back, if need be), belay biner locked, belay device oriented the proper way, rope fed through the device properly. If they are using a gri-gri you can do a pull check by simply pulling on the climbers side of the rope to make sure the gri-gri locks properly. Don’t skimp on the belay check. Not only should you know how to do a proper partner check already, but sloppy climbers do sloppy checks. Give yourself the best chance to pass.
When you are climbing be conscious not to back or z-clip. Step around the rope when moving across the draw lines. Clip all the draws. Clip the anchors so the gates are facing opposite directions. Most gyms will require a fall at some point. Make it a legit lead fall by being above the bolt. Hopefully your belayer gives you a nice soft catch! If not, they will fail, and you will be left to top-rope and boulder like the rest of the guppies. If all goes well, the instructor will ask you to switch with your partner and you can do the belay section of the test.


When you’re the Belayer
Load the device correctly: a gri-gri has a nifty pic on the inside to show the climber side and break end side. Most tube devices have teeth on the break end, but they also have a pic to show the climber’s and break ends. Don’t screw this up or you will auto-fail. Then you can do a FULL partner check. A FULL check this time includes: harness is on properly, rope goes through two tie-in points, proper well dressed figure eight knot (you should be able to count five pairs of rope on both sides of the eight knot), and double fisherman’s stopper knot (look for a cross on one side and is parallel on the other).
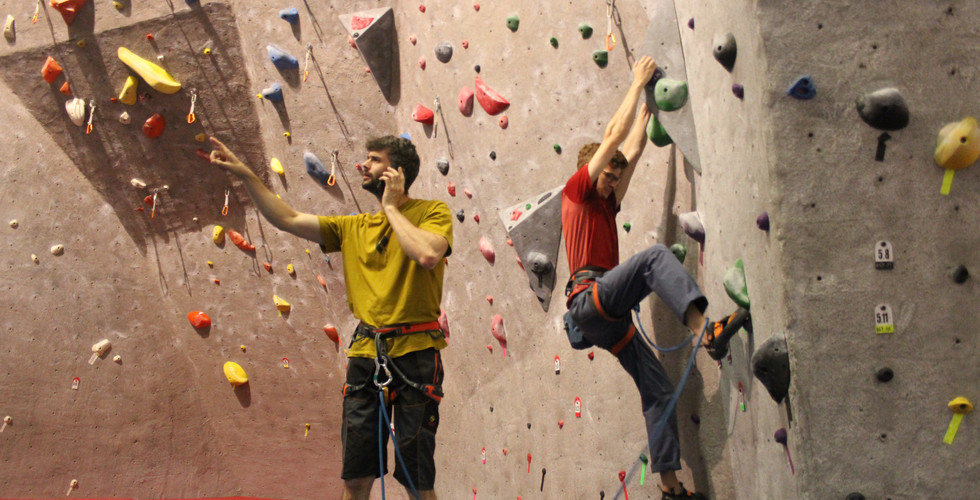
When your climber starts to climb, spot until the first clip. There are so many ways to spot and pros/cons to each. Let’s not start a thumbs in vs thumbs out debate here, but in general you want to guide them safely to the ground if they fall. Do not to catch them. Don’t stand directly underneath them. And be in an athletic stance (one leg back the other leg forward).
There are a lot of intricacies to spotting which you can read about here.
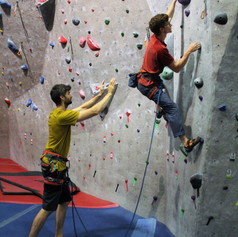
Once the climber clips the first draw, the majority of the uninformed population take a few gigantic steps backwards. But, unlike them, you’re no chuffer! You know how to position yourself properly. The proper stance at the beginning of a climb (normally the first three or four clips the climber makes up the route) is OPPOSITE the draw line. This means, if they are left of the draws, you’re on the right, and vice versa. The reason for this is that if your climber falls, you don’t want them to fall on top of your head, giving you an ass-hat. I have seen videos of climbers falling on top of their belayers heads so hard that they needed to go to the hospital to see if their spines were still in-tact.


In addition to being in the proper position, you also want to keep the climber on a shorter belay for the first few draws. If you have too much slack out and your climber falls, they may deck (hit the ground). If they hit the ground hard enough they could break their legs, back, arms, depending on how they hit. Periodically glance at the slack you have out and say to yourself “what happens if they fall now?” Adjust slack accordingly.
Once the climber has passed the 4th draw, they probably won’t deck or hit you if they fall. You are now able to move into in best belay position which is 1.5 meters from the wall, directly in front of the first quickdraw. You should be facing the wall and be in an athletic stance. That means your right leg should be slightly behind your left leg. This puts you in a ready position to catch a fall. This will be your stance/position for the remainder of the climb. You can move in and out a little to feed slack quickly, but you will want to always return to this position. You can also keep them on a looser belay. Having just a little bit of extra slack out here allows you to give a softer catch if the climber falls, gives you a little extra reaction time to catch a fall, and prevents some short roping that could occur on a tighter belay.


Now that we’ve covered positioning we can cover the Best Practices for feeding slack. But first I’d like to take a minute to go on a tangent about safety. There are a lot of ways to feed slack with a Gri-Gri, but over time the technique changes to be safer. If you belay with the current standardized belay method that PETZL recommends, you won’t have any issues. If you come in to the gym with the mindset of “I can do whatever the hell I want because I’m the best,” you’ll be leaving a bad google review of how the instructors don’t know what they are talking about because they failed you for being unsafe. Just learn the CORRECT METHOD! It’s not that hard! In a gym setting you can’t hip belay with a hemp rope, even though that was the standard in 1920’s. Instructors don’t care that you’ve been belaying for 20 years and haven’t had any issues. If that guy from 1920’s was alive he’d be saying “I’ve been doing this for 100 years!” but we’d still all look at that old S.O.B. like he’s crazy.
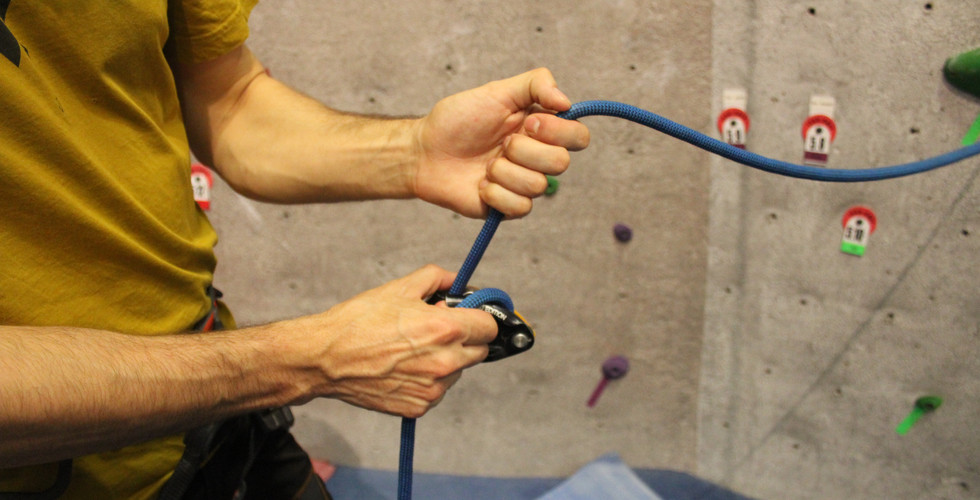
So, what are you supposed to do? When feeding slack slowly we can use a method called shoveling. Your left hand should be on the climber’s side of the rope, your right hand is on the break end. Slide your left hand down toward the belay device, and your right hand down the rope away from the device, then slowly bring both your arms forward. Think about pushing the rope into the belay device with your right hand and pulling it out with your left. Keep your right arm low during this process. Having your right arm down below the device is called the break-position, as this increases the friction through whatever belay device you are using. Now if you are using an ATC (tube style belay device) your right hand should never hang out above the device, this might cause you to fail your belay test. An ATC only breaks if your hand is below the device, so you should keep it below as much as possible. To feed slack faster with an ATC (e.g. when your climber is about to clip) just do this shoveling method faster. Super simple.


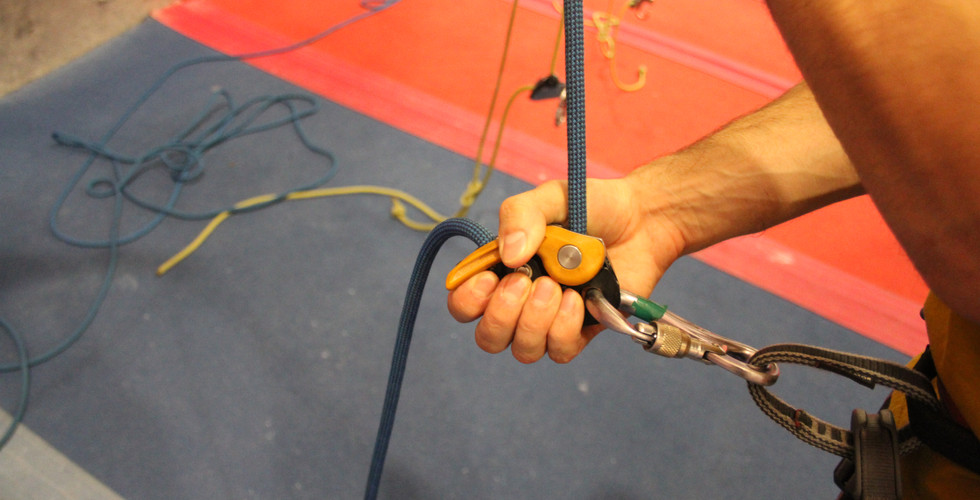
Now to feed slack quickly with a Gri-Gri, you’ll need some fancy finger work. Your index finger on your right hand will brace itself against the right lip of the Gri-Gri. Your right thumb will then go behind the rope, covering the lever of the device. You should still be holding the rope with your middle, ring, and pinky finger. Your thumb presses over the lever so the camming unit cannot engage. You will then bring your left hand down to the device and pull as much rope out of the device as needed. This should be a smooth, fluid, efficient motion. Once your partner gets slack, take your thumb off the level and return to the break position. Never have your thumb over the camming mechanism longer than necessary! DO NOT grab the whole device with your hand! DO NOT let go of the break end of the rope for any reason! You’ll auto-fail faster than a lighting strike.
If you fed out too much slack, or need to take in some slack to make the rope tighter use the standard top rope belay method PBUS (Pull, Break, Under Slide) which you see here.


Catching a Fall

You will need to show that you can actually catch your climber if they fall in order to pass your belay test. Normally when the climber gets near the end of the route they will be told to fall. Some gyms let the climber call out “Falling!” while others don’t allow any warning. Now catching falls is all about weight differences. If the climber weighs more than you, you will probably be pulled up automatically—just get ready to place your feet on the wall with the bottom of your shoes. If your climber is lighter than you, you will have to time your jump in order to give a soft catch. As the climber comes to the bottom of their fall, you will actively jump a bit, get your feet ready to place on the wall. Mistime your jump, or don’t jump at all and you could really injure your climber. Your goal is to catch falls so softly, that a litter of kittens sleeping on fluffy pillows are jealous. It is a common mistake for beginner belayers to pull in slack and sit back when their partner falls. DON’T DO THIS! I know many people who have broken their legs/ankles because of their belayers’ poor catching skills. A soft catch will have your climber come to a slow and controlled stop. A hard catch will whip your climber so hard into the wall that their legs explode. This isn’t an exaggeration check out the x-ray of a climber in this similar situation.
After your climber is finished, you’ll need to lower them safely. With an atc, put both hands on the break end, tell your climber to sit back, and lower them by letting the rope slide through both of your hands. With a gri-gri, keep your right hand on the rope in the break position, and pull the lever steadily with your left hand. Keep a nice controlled speed until they get to the ground. And now you wait for the news to see if you’ve passed or failed!
Hopefully you’ve followed the best practices and passed your lead belay test. If not, go yell at your friend Jim for being a bad instructor and learn from your mistakes. Also, here are some additional tips that will make you an awesome belayer that people will want to climb with:
Flake the rope out of the way on the right side of the route out of the way. You’ll never be concerned about stepping on it during the test and it will be in the optimal feeding position. It will also remove any tangles from the rope so you won’t run into any knots.
Try to anticipate when your partner clips quick-draws. You don’t want to short rope the climber when they pull up slack. Pay attention and be ready!
Falls can happen at any time. A hold could spin, they could mistake a handhold for a foothold, they could pump out. Always be thinking “what happens if they fall now…now…now? That way you are always ready to give the safest catch for your climber.
Stay Calm. Some people get so nervous during the test they make silly mistakes. I’ve seen people fail tests just because of how nervous they are. Stay calm. Breath deep.
Climb with someone you trust. If you trust your partner, that’s one less thing you need to worry about.
Be open to criticism. If you fail, there’s a reason. Don’t argue. Instead, listen to why you failed, and learn from the experience. It will probably make you a safer climber. Also, gyms WANT you to pass. They want you to climb at their facility. How else would they stay in business? However, they will only pass people if they believe they will be as safe as possible.
Special Thanks goes out to Daniel Wilson, James Thompson, and Stacey Franklin for finding many many spelling errors and helping with the professional photography work.
Comments